


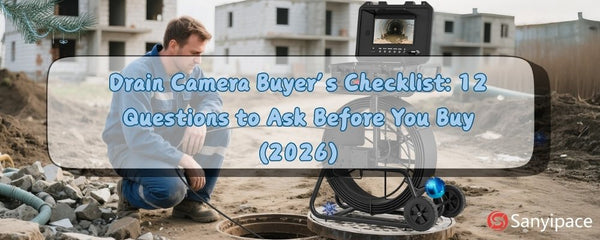


Sanyipace Telecamera idraulica: ispeziona gli scarichi & Tombini facilmente
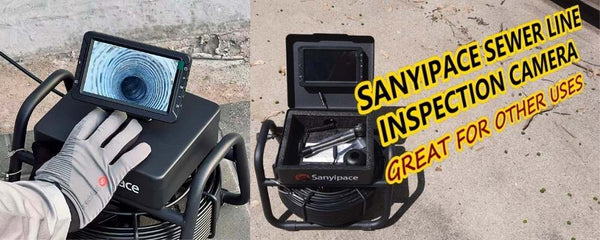
Ciao, sono Sean. Sono in officina oggi e volevo mostrarti questa nuova telecamera idraulica che ho ricevuto da
So che molti di voi hanno menzionato quanto sia utile un telecamera di scarico sarebbe adatto al tipo di lavoro che faccio. Così alla fine ne ho preso uno. Lasciate che vi mostri cosa può fare questo potente strumento e come si adatta al mio lavoro di idraulica e ispezione.

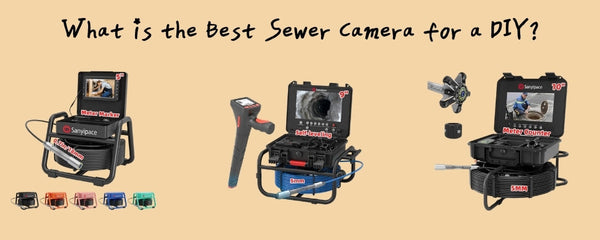
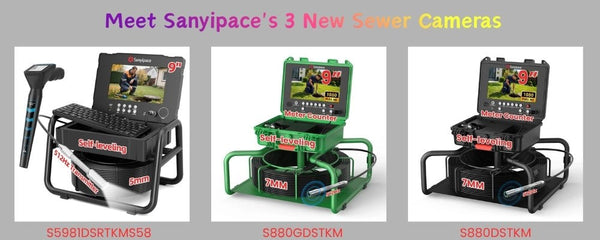
Disimballaggio del Sanyipace Telecamera idraulica
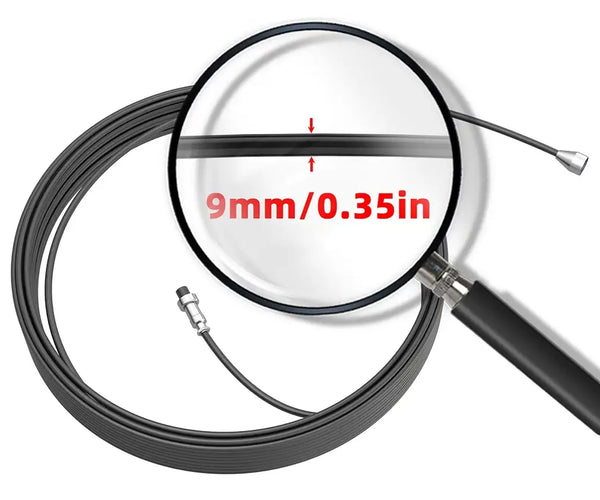
Questa telecamera idraulica è dotata di una comoda custodia imbottita. All'interno troverete tutti gli accessori.
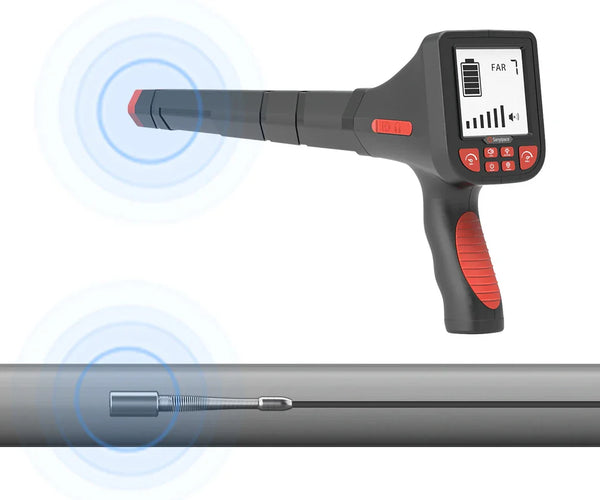
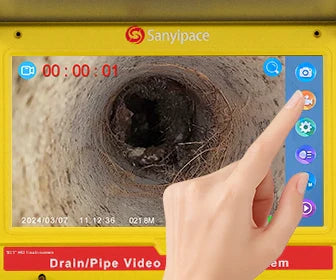
L'unità è dotata di un 9" schermo, ampio e facile da vedere. È inoltre dotato di un parasole regolabile per uso esterno. sistema di telecamere fognarie include una batteria ricaricabile che alimenta la telecamera per ore dopo una ricarica in ambienti chiusi.
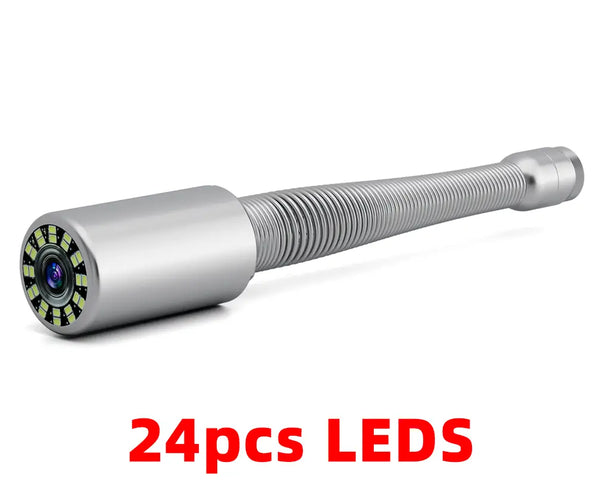
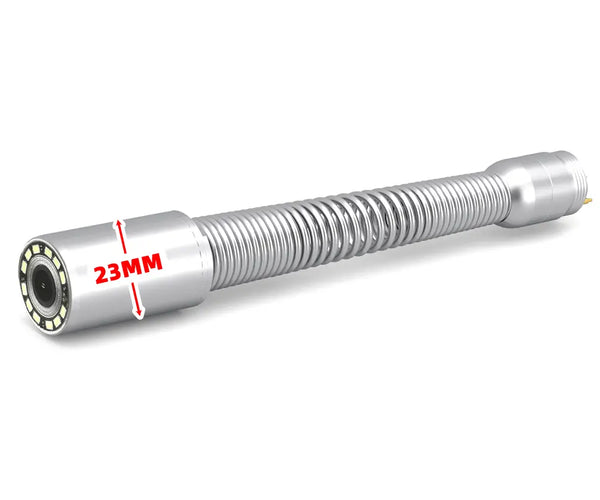
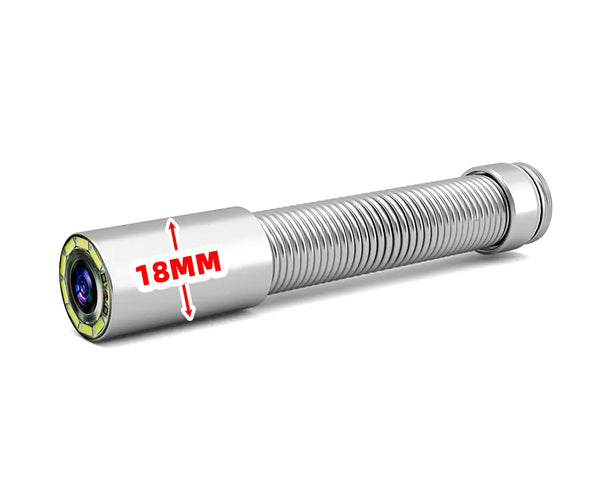
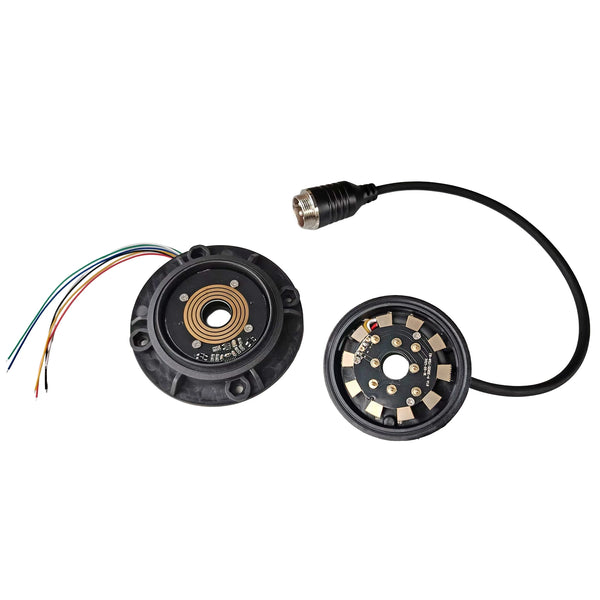
IL testa della telecamera È autolivellante, dotato di luci LED integrate e di una molla flessibile che ne facilita la movimentazione attraverso i tubi. Questa versatilità è fondamentale per i lavori idraulici.

Utilizzo di una telecamera idraulica per l'ispezione e la pulizia dei pozzi
Pulizia profonda del pozzo con monitoraggio in tempo reale
Osservazioni iniziali
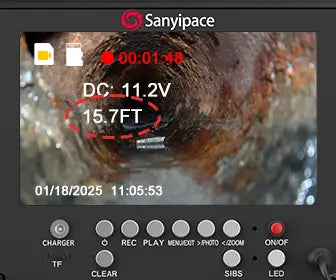
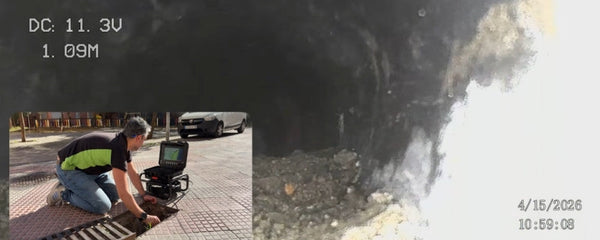
Accendiamo la telecamera. La pompa del pozzo si è appena accesa e abbiamo notato un notevole calo del livello dell'acqua. Stiamo monitorando l'ingresso dell'acqua dai lati del pozzo. A circa 13 metri, la telecamera ha ripreso dei detriti che bloccavano la visuale.
La pompa si è attivata di nuovo e ho posizionato la telecamera appena sopra la linea di galleggiamento, così potete vedere come abbassa il livello dell'acqua. Sto cercando di seguirlo in tempo reale. L'acqua è piuttosto torbida e ho iniziato a registrare. Potete anche vedere che l'involucro è piuttosto sporco in alcuni punti.
C'è molta acqua torbida e segni di corrosione o ruggine lungo le pareti dell'involucro. Quando la pompa si accende, il livello dell'acqua scende rapidamente: al momento siamo a circa 17 metri.

Valutazione della qualità dell'acqua
Una cosa fondamentale che dovevo capire era la profondità dell'acqua. Inizialmente, era di circa 13 metri, e scendeva quando la pompa era in funzione, per poi risalire quando si fermava. Questa è una lettura fondamentale per valutare le condizioni del pozzo. Da questa ispezione iniziale, la qualità dell'acqua è chiaramente scarsa.
In base a ciò che ho visto, ho deciso di effettuare una pulizia profonda. Un'altra cosa che volevo determinare era la profondità della pompa. Normalmente, non si immerge la telecamera direttamente nell'acqua del pozzo, ma poiché è già molto sporca e necessita di pulizia, ho deciso di procedere. Ho spinto la telecamera verso il basso finché non ha incontrato resistenza, forse un limitatore di coppia o la parte superiore della pompa. Questo mi ha dato una stima approssimativa della profondità della pompa, che sembra essere di circa 33 metri.

Per pulire a fondo il pozzo, ho utilizzato un prodotto shock per piscine contenente ipoclorito di calcio al 73%. Il piano era di versarlo nel pozzo e far ricircolare l'acqua per almeno un'ora. Dopo aver lasciato il sistema in funzione per un po', ho notato che il cloro aveva sciolto una notevole quantità di incrostazioni.
Ho lasciato scorrere un tubo da giardino nel bosco per diverse ore per risciacquare l'impianto, il che ha contribuito a pulire l'acqua. Poi, ho rimesso in funzione la telecamera per ispezionare nuovamente l'involucro dopo il trattamento con cloro. Sebbene l'acqua sembrasse ancora un po' agitata, l'involucro stesso appariva molto più pulito. Ho continuato a sciacquare il sistema per altre tre ore, il che ha aiutato notevolmente, anche se non ho più fatto funzionare la telecamera dopo il risciacquo finale.
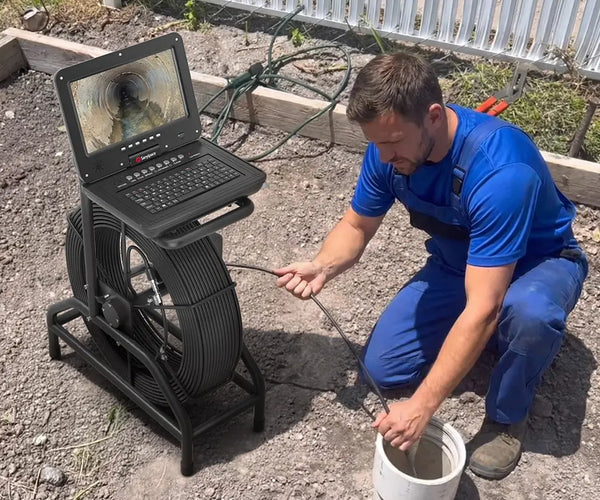
Ispezione dei sistemi di drenaggio con una telecamera idraulica
Risultati in tempo reale e risoluzione dei problemi
Navigando nello scarico
Il contatore sembra un po' scuro, ma guardate un po': c'è dell'acqua trattenuta lì dentro. Mentre mi muovo, sembra di aver trovato un raccordo a Y. Appena a monte di quel raccordo a Y, vedo un piccolo accumulo di sedimenti. Spero che l'acqua scorra nel percorso corretto. A circa 1 metro e mezzo, quel sedimento diventa evidente. Di nuovo, sembra che in quella zona ci siano dei detriti o accumuli, probabilmente trattenuti dalla forma del tubo. C'è anche la possibilità che questo possa indicare una leggera rottura o imperfezione nella tubazione.
Ho difficoltà a girare intorno a questo angolo. telecamera idraulica Viene fornito con un set di piccole boccole, quindi proverò a montarne una per aiutarmi a superare la curva, anche se non sono esattamente sicuro di dove ho lasciato il cacciavite. Proviamo comunque. Okay, con la boccola montata, ha superato con successo quella curva stretta. C'è un altro raccordo a Y poco più avanti, anche se ora comincio a pensare di stare andando nella direzione sbagliata.

Interpretazione dell'accumulo di sedimenti
A questo punto, il tubo sembra in ottime condizioni. Spingere la telecamera sta diventando più difficile, visto che sono a 30 metri. Credo di aver raggiunto la fine del cavo, quindi andrò dall'altra parte e bloccherò l'apertura per controllare la luce. Tornato all'altra estremità, ho visto la luce tremolare quando l'ho coperta, quindi so che la telecamera ce l'ha fatta. Riaccenderò il LED e proverò a spingere ancora un po', ma con quasi 30 metri di cavo in uscita, potremmo essere al limite. Il flusso sembra limpido oltre quel punto e non ci sono ostruzioni visibili, solo quel po' di sedimento all'inizio, nei primi metri.
Questo è un ottimo esempio di come è possibile utilizzare una telecamera di ispezione per generare entrate aggiuntive, controllando i sistemi di drenaggio esterni per individuare accumuli di sedimenti, problemi di flusso o persino danni alle tubazioni come crepe e rotture.
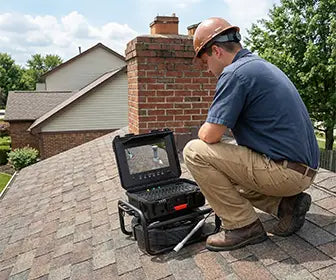
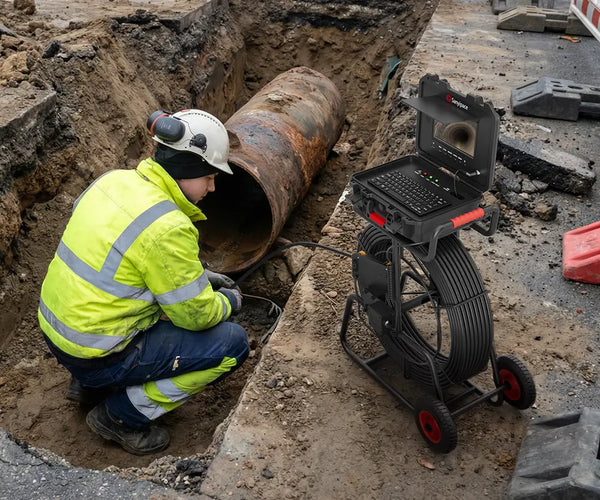
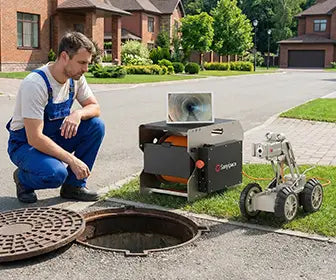
Telecamera idraulica per l'ispezione delle condotte fognarie
Ispezione dell'interno del tombino
C'è un tombino proprio sottoterra qui: è lì che ho fatto il collegamento. Sono passati un paio di mesi da quando ho fatto quel lavoro e volevo controllare come si comporta. L'unico modo per vederlo chiaramente è attraverso il tombino, quindi ci sto inserendo la mia telecamera a circuito chiuso per dare un'occhiata. Finora, sembra piuttosto solido. Un consiglio veloce: a differenza dei tombini rotondi, questi rettangolari possono effettivamente cadere attraverso l'apertura, quindi assicuratevi di non farlo cadere, altrimenti dovrete entrare e recuperarlo.
Sono quasi arrivato, devo solo superare questo piccolo ostacolo. Il problema è che si tratta di un tubo di circa 60 cm di diametro e la telecamera fognaria non riesce a passare facilmente in uno spazio così largo. Si è incastrata, quindi ho dovuto saltare nel bacino di drenaggio per aiutarla a passare manualmente.

Quello che vedete qui è la malta che ho installato attorno al tubo di drenaggio a doppia parete. Ho usato cemento idraulico per sigillarlo e ha fatto presa benissimo. C'è pochissimo spazio per lavorare lì dentro, quindi mi sono graffiato le mani e sono completamente ricoperto di terra, ma è proprio quello che ero venuto a controllare.
Volevo solo assicurarmi che il cemento a presa rapida fosse ancora intatto. Da quello che vedo, sta reggendo davvero bene. Ora sono dentro il tombino e sto tirando leggermente indietro la telecamera per avere una visuale migliore. Quella fessura è ancora sigillata ermeticamente e sono soddisfatto di come sta funzionando il tutto.

Come fare soldi con una telecamera idraulica
Se lavori nel settore idraulico, dell'irrigazione o della manutenzione immobiliare, questo strumento può aumentare notevolmente i tuoi guadagni.
Ecco solo alcuni dei servizi che puoi offrire utilizzando una telecamera per l'ispezione idraulica:
-
Ispezioni dei pozzi
-
Valutazioni del sistema di drenaggio
-
Ispezioni delle linee fognarie
-
Documentazione video per proprietari di case o amministratori di immobili
-
Rapporti di pulizia preventiva e manutenzione
Ispezione degli scarichi del cliente
Questa è la prima volta che uso la telecamera per scarichi per un lavoro retribuito, quindi sono piuttosto entusiasta. Andiamo avanti, accendiamola e prepariamo tutto. Oggi ho intenzione di attaccare il rullo da 10 cm. Non ho ancora trovato il cacciavite giusto, ma questo andrà bene. Sta facendo buio, quindi accendo la luce LED e inizio la registrazione. Ecco il nostro primo giunto di tubo, giusto per assicurarmi che sia ben visibile.
A circa 7 metri di profondità, si nota un evidente rigonfiamento nel tubo. Sembra danneggiato, il che probabilmente spiega perché il rullo da 10 cm non è riuscito a passare. È in PVC Schedule 30, che di solito evito di usare. Si notano anche alcuni segni di ritenzione idrica. Il resto del tubo sembra in buone condizioni, con una curva a 90 gradi. C'è un'altra piccola area danneggiata, ma nel complesso sembra ancora funzionante.

Volevo ispezionare i tratti di tubo corti, ma quegli adattatori per pluviali bloccano l'accesso. Sono rivettati, il che significa che dovresti forarli per ispezionare qualsiasi cosa. Ecco perché evito di usare quel tipo di adattatori: non puoi semplicemente infilarci dentro quando necessario.
C'è molta acqua in questa zona, e rimane bagnata. Ma il terreno più elevato vicino alla casa è asciutto. Inizialmente ho sospettato una rottura nel tubo che permetteva all'acqua di infiltrarsi nel sottosuolo. Noterete delle rocce posizionate lungo le fondamenta: trattengono e rallentano il flusso dell'acqua. Se i tubi funzionano bene, la teoria successiva è che le grondaie siano traboccanti.

Ho parlato con il proprietario di casa della possibilità di controllare le cose durante la pioggia. Se le grondaie traboccano, l'acqua potrebbe infiltrarsi nelle rocce e rilasciarsi lentamente nel terreno, causando quella costante umidità. Abbiamo anche ripulito il bacino di drenaggio, quindi questo dovrebbe aiutare a spostare l'acqua superficiale in modo più efficace.
Ho ispezionato i tubi e ho verificato che non sono rotti o scollegati. Ora aspettiamo che il proprietario di casa verifichi se il problema sono le grondaie. Anche il miglior sistema di drenaggio non sarà d'aiuto se l'acqua non viene raccolta e convogliata correttamente fin dall'inizio.

Conclusione
Ecco cosa penso stia succedendo. Lasciatemi parlarne ancora un po'. telecamera idraulicaHo avuto questo tubo telecamera Da un po' di tempo. E ci ho fatto diverse cose. Spero che abbiate davvero capito il valore di una telecamera come questa per controllare diversi tipi di tubature. L'ho usata per il mio pozzo e per un paio di tubi di drenaggio. Potete usarla anche per le fosse settiche e simili.
Finora, questa cosa ha funzionato davvero bene per me e mi piace molto. Se vi ho ispirato ad acquistare una telecamera di ispezione e ne capite il valore, inserirò nella descrizione un link dove potete acquistarla direttamente dal produttore. Spero che questo video vi sia piaciuto, in cui parlo di una nuova attrezzatura che ho appena acquistato. Questa telecamera sta funzionando piuttosto bene. Penso che sarà un'ottima aggiunta a quello che sto facendo qui, quindi se vi è piaciuto, assicuratevi di cliccare sul pulsante "Mi piace" e ci vediamo al prossimo.

Finora, questo dispositivo ha funzionato davvero bene per me e mi piace molto. Se vi ho ispirato ad acquistare una telecamera di ispezione e ne capite il valore, inserirò nella descrizione un link dove potete acquistarla direttamente dal produttore. Spero che questo video vi sia piaciuto, in cui parlo di alcune nuove attrezzature che ho appena acquistato.
Questa macchina fotografica ha funzionato piuttosto bene. Penso che sarà un'ottima aggiunta a quello che sto facendo qui, quindi se ti è piaciuta, assicurati di cliccare sul pulsante "Mi piace" e ci vediamo al prossimo.
Link al prodotto: https://bit.ly/47jNRNq
Guarda la recensione video qui: https://www.youtube.com/watch?v=_RqR3m3w5Zg


Lascia un commento