


How to Choose the Length of a Sewer Camera Cable?
Choosing the right sewer camera cable length can save you money upfront and save you time and effort during use.
-
If the cable is too short, you won't be able to see the source of the problem.
-
Too long? Not only will you be lugging around a heavier reel and spending more, but it will actually slow you down around bends.
This guide helps you choose a cable length based on where you’re entering the pipe, how far you need to reach, and how complex the run is.
Quick Guide to Sewer Camera Cable Lengths

65- 100 ft (20-30 m) → Most common DIY home checks and shorter residential runs
100-165 ft (30-50 m) → Better coverage for main line inspections and “not sure where the issue is” situations.
230–525 ft (70–160 m) → Long runs, deeper inspections, or more demanding/pro-style work.
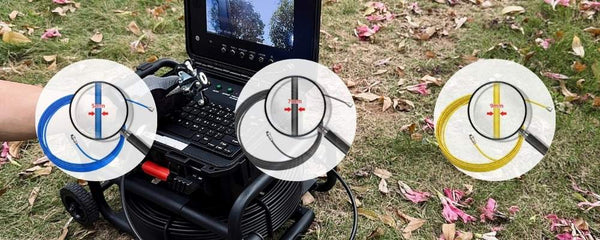
The SANYIPACE website provides various camera cable lengths, including 65ft, 100ft, 165ft, 230ft, 330ft, 400ft, 525ft, and even longer.
Click to browse SANYIPACE's sewer camera options with different cable lengths.
How to Measure Length?
The core principle for selecting sewer camera cable length is: measure precisely, never guess. The most common and costly mistake is estimating based on house square footage. Sewer pipes follow winding paths underground, so accurate measurement must be based on the actual pipe route.
Step 1: Identify Your Starting Point (Cleanout Location)
Before selecting any cable length, ask yourself: Where will you insert the camera?
Common insertion points include:
-
Outdoor cleanouts (typically closer to the main sewer line, potentially requiring shorter cables)
-
Garage/basement cleanouts
-
Indoor access points (reaching the same location usually requires longer cables)
Rule of thumb: Starting outdoors usually shortens the distance you need to probe. Starting indoors typically requires longer cable—especially if your goal is to probe to a yard or street connection.
Step 2: Estimate the Distance You Actually Need
1) First, estimate the distance to your "target point." (The closer you follow the likely pipe path, the more accurate.)
Best method: Use a tape measure or measuring wheel. Start from the cleanout and walk along the path you think the pipe runs toward your target area (e.g., street main, septic tank). Record the distance.
2) Can't measure physically? Use the "Path Breakdown" method for a quick estimate.
Simply estimate each segment along this route:
Cleanout → House exterior wall exit → Across the yard → Target point (e.g., street curb, municipal connection direction).
3) MUST ADD A BUFFER (This is critical!).
To your estimated distance, add an extra 6–9 meters (20–30 feet), or calculate +20%.
This buffer prevents the "so close, yet so far" scenario of being just short and allows you to stop and re-inspect a section if needed.
4) Final Step: Choose the Standard Length – Round UP.
Take your "Estimate + Buffer" total and round UP to the nearest standard cable length (e.g., 100ft / 30m, 165ft / 50m, 200ft / 60m, 230ft / 70m, etc.).
Detailed Cable Length Recommendations (65ft to 525ft)

Based on the decision logic, here are specific, scenario-based recommendations.
|
Property / Application Type |
Typical Pipe Run |
Recommended Cable Length |
Key Rationale & Pro Tips |
|
Townhouse / Urban Cottage |
50 - 100 ft |
65-100 ft |
Lines are short and direct. A 100ft cable provides ample margin for navigating interior bends and reaching the street tap. |
|
Standard Suburban Single-Family Home |
100 - 200 ft |
125-200 ft |
The industry workhorse. A 200ft reel confidently handles runs from backyard cleanouts to street mains with margin for extra bends or tracing lateral lines. |
|
Large Estate / Rural Home |
200 - 350 ft |
250-300 ft |
Long distances to septic tanks or deep street connections are common. A 300ft cable is ideal; verify the exact distance from site plans first. |
|
Small Commercial / Multi-Unit Building |
250 - 400 ft |
300-400 ft |
Main stacks and laterals are extensive. Requires a commercial-grade, heavy-duty cable with superior abrasion resistance and signal integrity. |
|
Large Commercial / Municipal / Industrial |
350 - 500+ ft |
400-525 ft or Push Rod System |
For extreme distances. Dedicated long-length cables or push rod systems are necessary to maintain torsional control and video quality over 400ft. |
You can refer to the above room types and recommended cable lengths, then combine them with your actual estimates to select a sewer camera of appropriate length for inspecting your home's plumbing issues.
Practical Application: A Case Study

A plumber is called to a 1970s suburban home with recurring slow drains. The cleanout is located at the back of the foundation, and the sewer main is situated under the street in the front, approximately 120 feet away, based on the plot plan.
-
Basic Calculation: 120 ft (run) + 20% (24 ft margin) = 144 ft minimum cable needed.
-
Professional Action: The plumber uses a 200ft cable. This allows them to:
- Navigate the 90-degree bend at the street tie-in.
- Push 15 feet past the calculated main connection to investigate the municipal lateral.
- Discover a belly in the pipe 130 feet out, which would have been missed with a 150ft cable.
Outcome: A precise and defensible diagnosis is provided to the homeowner, leading to targeted repair instead of repeated guesswork. The job is completed in one visit, enhancing customer satisfaction and the plumber's reputation.
Common Pitfalls to Avoid
Buying "Just Enough" Cable: A 125ft cable for a 115ft calculated run invites failure. Always round up to the next common standard length (e.g., 150ft or 200ft).
Ignoring Cable Specifications: For longer runs, signal integrity is key. While sewer cables are different from video transmission lines, the principle is similar: longer distances demand better shielding and higher-quality conductors to prevent video degradation.
Neglecting Cable Care: Even the best cable will fail if abused. Always flush the line of debris before inspection, clean and dry the cable after use, and store it properly on its reel
4 Cable Factors That Change Results

Even with the “right” length, these factors decide whether the inspection feels smooth—or frustrating.
1) Cable stiffness (push strength)
More stiffness helps with long distances, but too much stiffness can fight tighter bends.
2) Cable diameter
Thicker can push better; thinner can bend easier. Match it to pipe complexity.
3) Number of bends and pipe layout
Every bend adds friction. More bends = slower progress and greater need for buffer.
4) Distance tracking workflow
For longer runs, distance marking/counter-style tracking can make it easier to:
-
Note where you saw a defect
-
estimate where it is for repairs
Therefore, when you're unsure, I recommend contacting our customer service team via this email address: service@sanyipace.com. They will assess your needs and provide you with a suitable range of options.
Finally
For the American homeowner considering a purchase for DIY use, a high-quality 100ft or 200ft camera system (matching your property scale) will handle over 90% of residential issues and provide immense peace of mind.
For the professional plumber building a business, your primary workhorse should be a durable 200ft camera. This is the industry standard for a reason. Then, consider adding a longer push-rod system or a 300ft+ cable as a strategic investment to capture more complex, higher-margin jobs.
Choosing the right cable length is not about buying the longest one available; it’s about matching a precision tool to your specific, measured needs. By applying this structured, practical approach, you ensure that your sewer inspection camera is a solution, not a limitation.
For a deeper analysis of when to tackle a job yourself versus when to call in an expert, explore our detailed guide: DIY vs. Professional Plumbing Inspections: Which Is Best for Your Home?


發表評論